Quick Start
Instalation
You can download from the Asset Store (In Progress) or Install the packages by following the steps below.
Singular Installation
To install each package individually, copy and paste the URL into the package manager's Git URL field:
- Utils:
https://github.com/Z3-Studio/UTK-Utils.git - UI Builder:
https://github.com/Z3-Studio/UTK-UI-Builder.git - Node Graph:
https://github.com/Z3-Studio/UTK-Node-Graph.git
If you encounter difficulties or prefer to use SSH, check the UPM Config documentation for guidance.
Express Installation (Recommended)
To quickly set up all packages, copy and paste the following into your manifest.json file:
"com.z3.node-graph": "https://github.com/Z3-Studio/UTK-Node-Graph.git",
"com.z3.ui-builder": "https://github.com/Z3-Studio/UTK-UI-Builder.git",
"com.z3.utils": "https://github.com/Z3-Studio/UTK-Utils.git",
Setup User Preferences
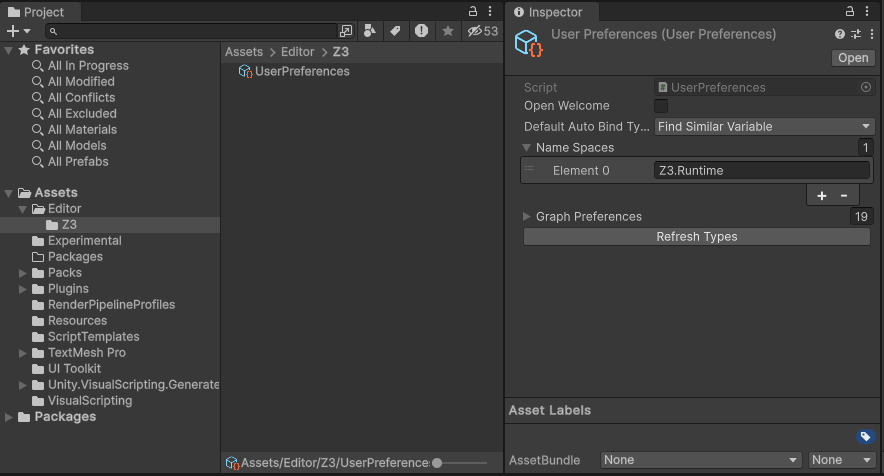
Navigate to Assets > Editor > Z3 > UserPreferences add your namespaces and click Refresh. This ensures that Node Graph lists all available types inside of your namespace.
Example: Adding the namespace Z3.Runtime will make all types within this namespace accessible, including sub-namespaces like Z3.Runtime.Player or Z3.Runtime.Player.State.
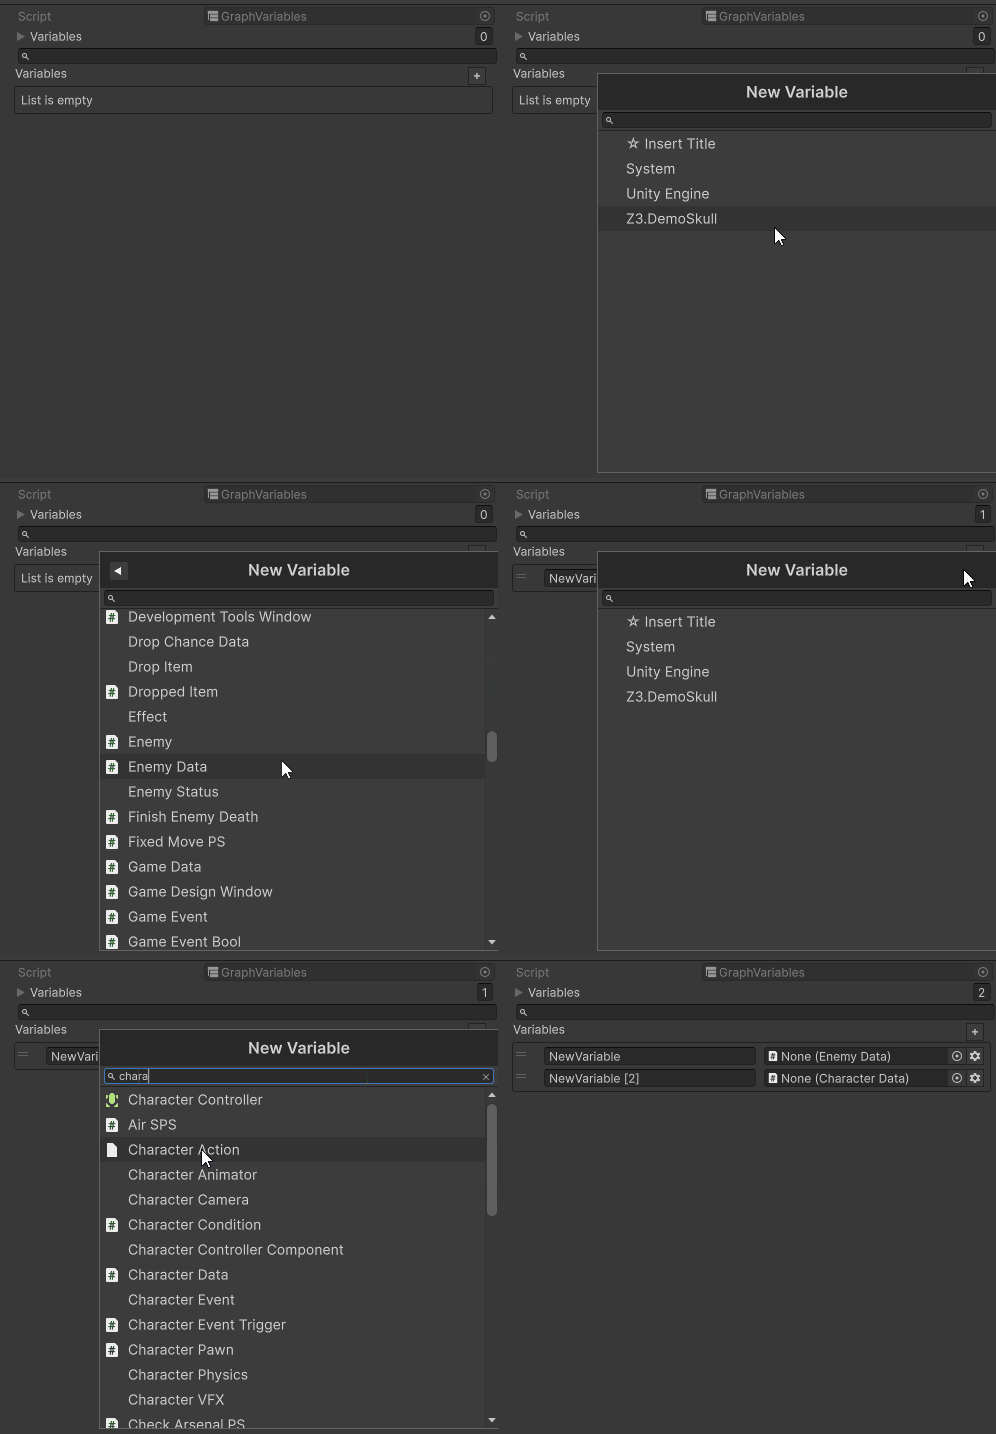
After updating the namespace, the new types will be visible in the panel for adding new variables. You can then add and use these types in your GraphVariables as needed.
Note: This file does not need to be versioned. It is recommended to add it to your .gitignore:
# Node Graph
Assets/Editor/Z3/UserPreferences.asset
Assets/Editor/Z3/UserPreferences.asset.meta
Get Started: Creating a Graph
In this quick start guide, you will learn how to create and run a State Machine using Node Graph
1. Create Assets
In project tab, right click and create two assets following the paths below.
-
State Machine by path
Create > Z3 > Node Graph > State Machine -
Graph Variables by path
Create > Z3 > Node Graph > Graph Variables

Configure your game object by adding the GraphRunner component and the GraphVariablesComponent
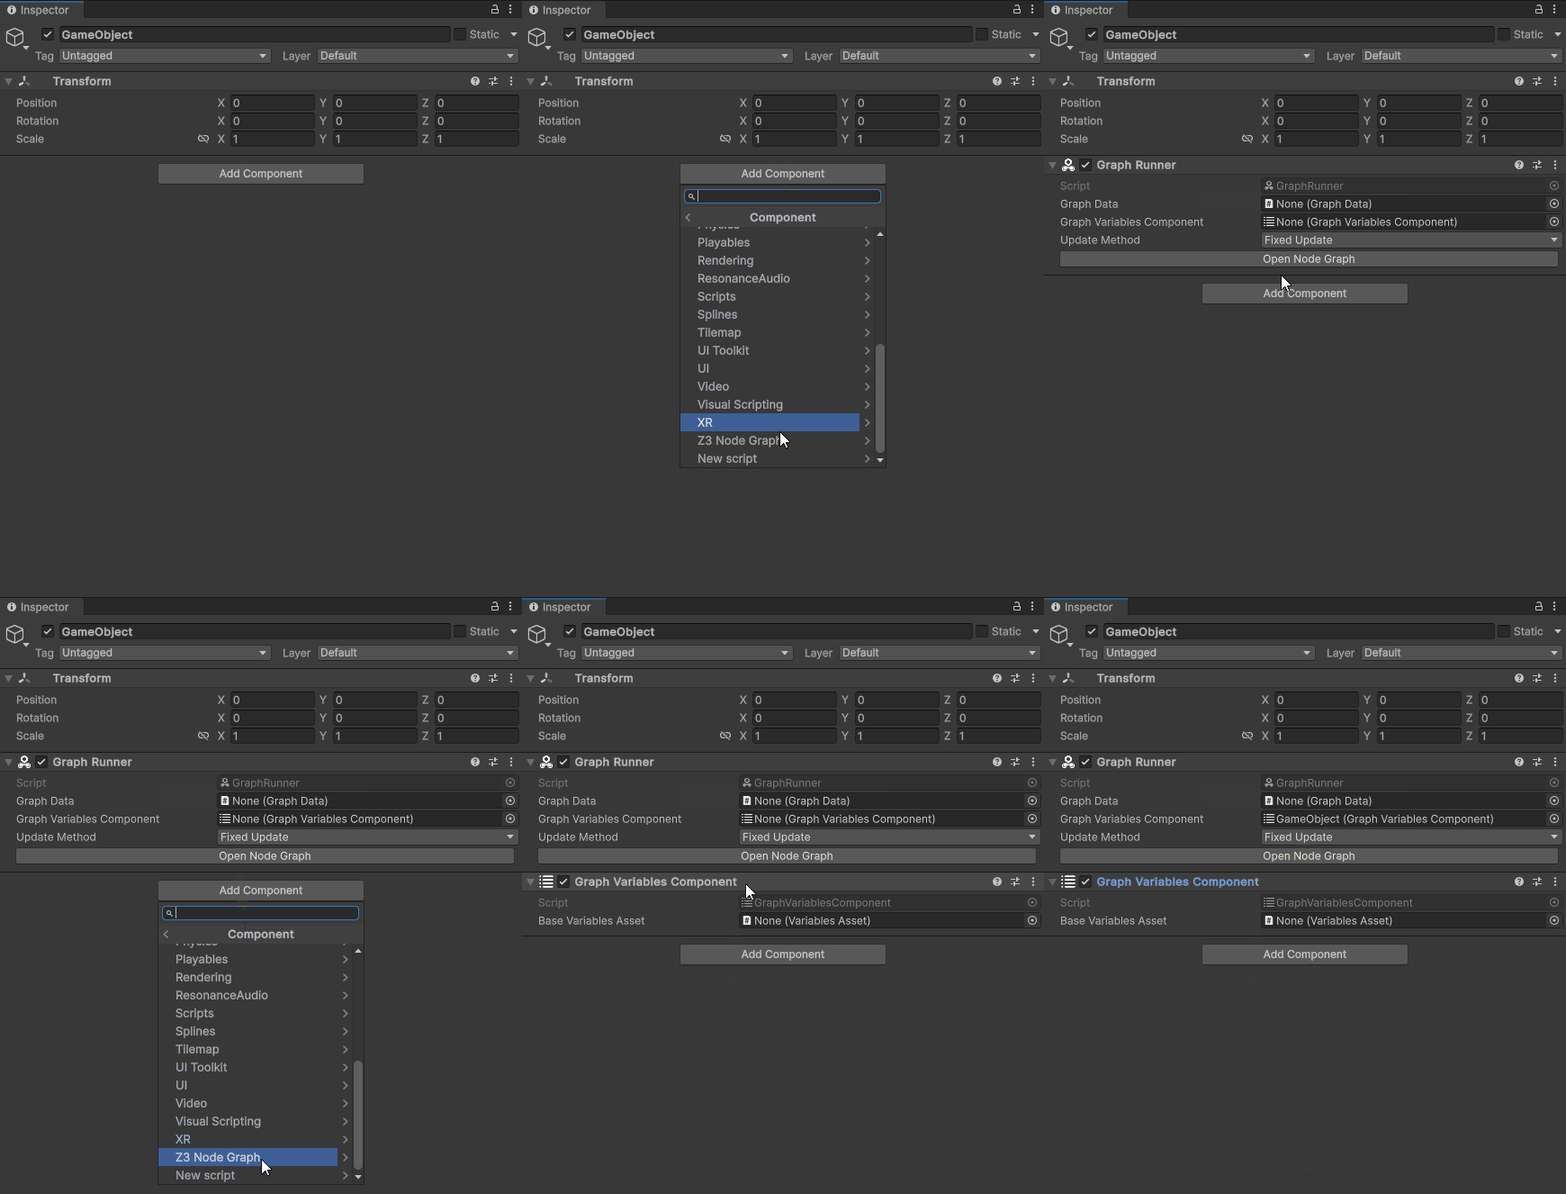
Make sure all fields are filled in
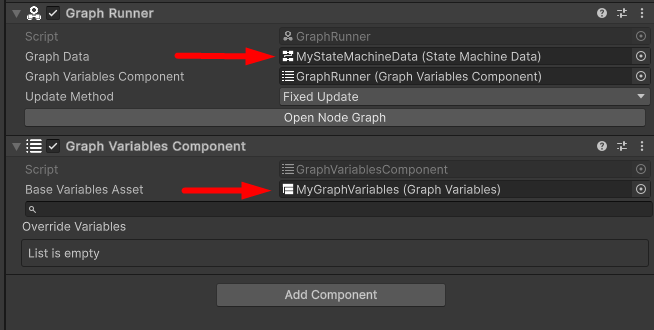
Click the Open Node Graph button to open the graph, fill in the Reference Variables field.
This will tell the graph which variables it should bind to via GUIDs.
Note: It is also possible to open the graph by double-clicking on the asset, however, during runtime it will not be associated with the generated instance.
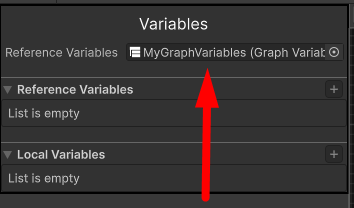
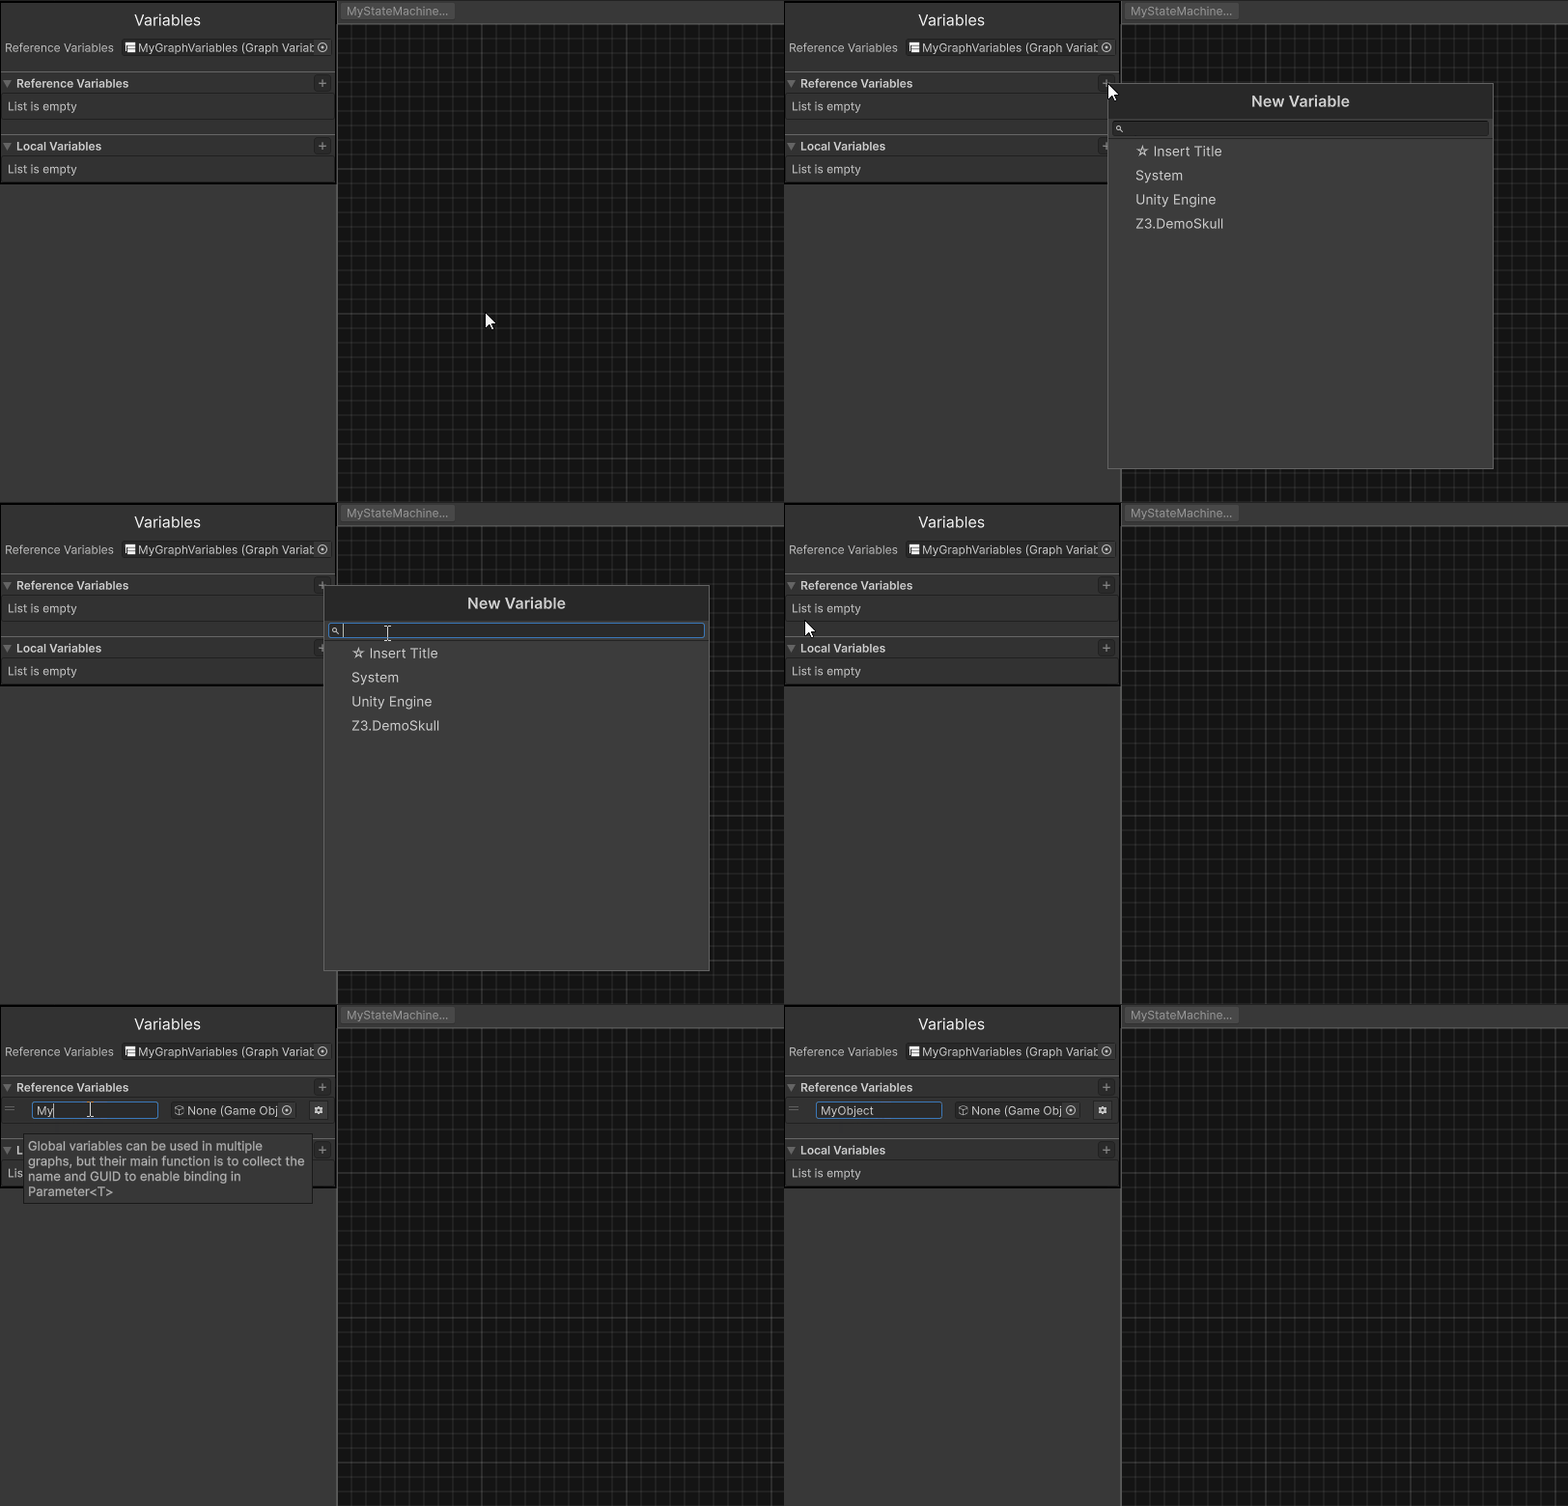
In the reference variables create two variables, one of type GameObject and another of type Bool
2. Creating your logic
Note: To understand how local variables work and the difference between reference variables, click here
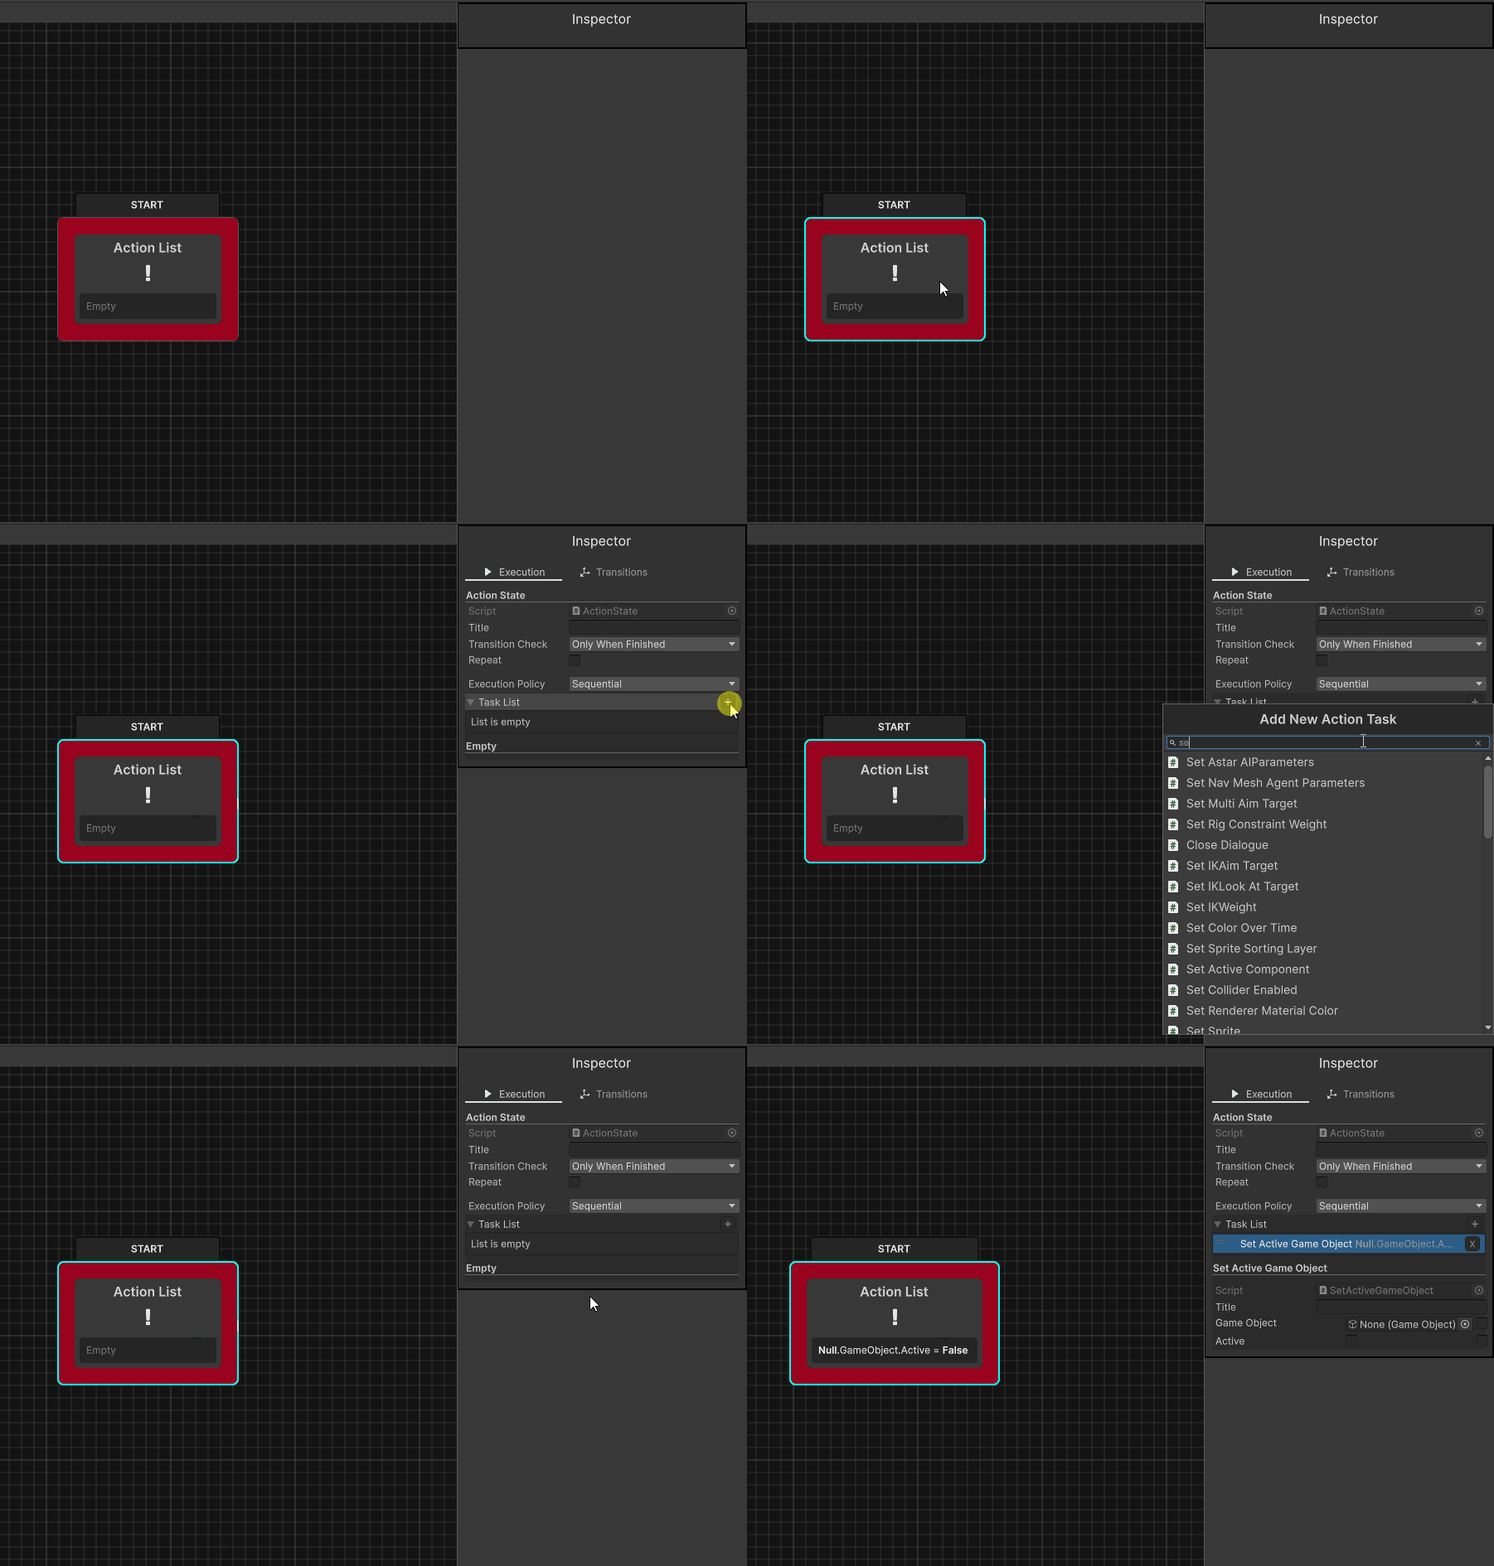
Right click to create an Action State. This state is used to execute an Action Tasks.

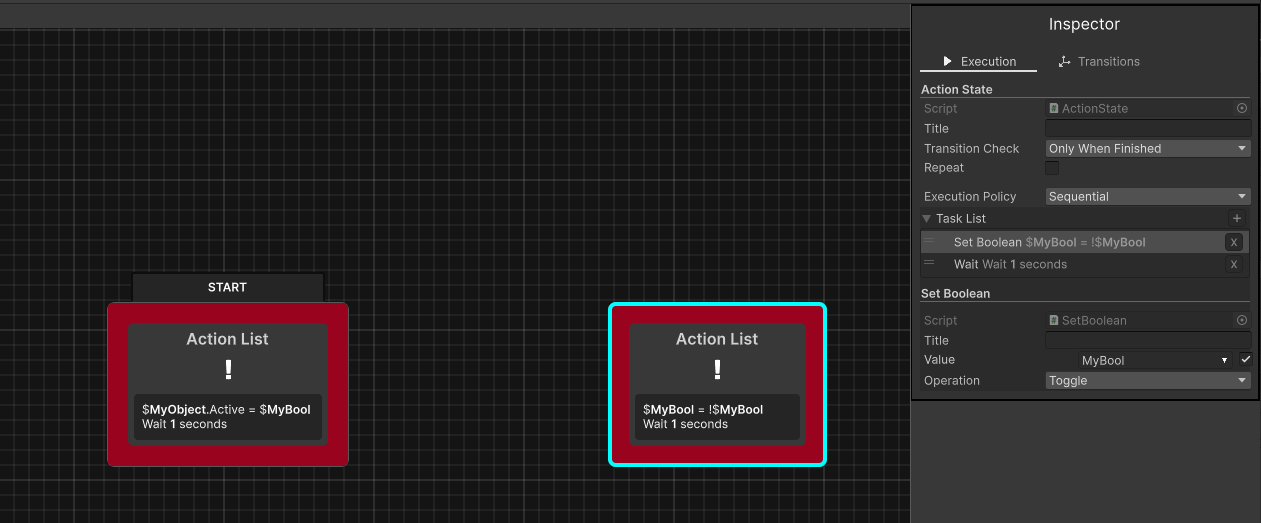
Create an Action Task by selecting the Node you want and accessing the Inspector. Click on + and search for Set Active Game Object
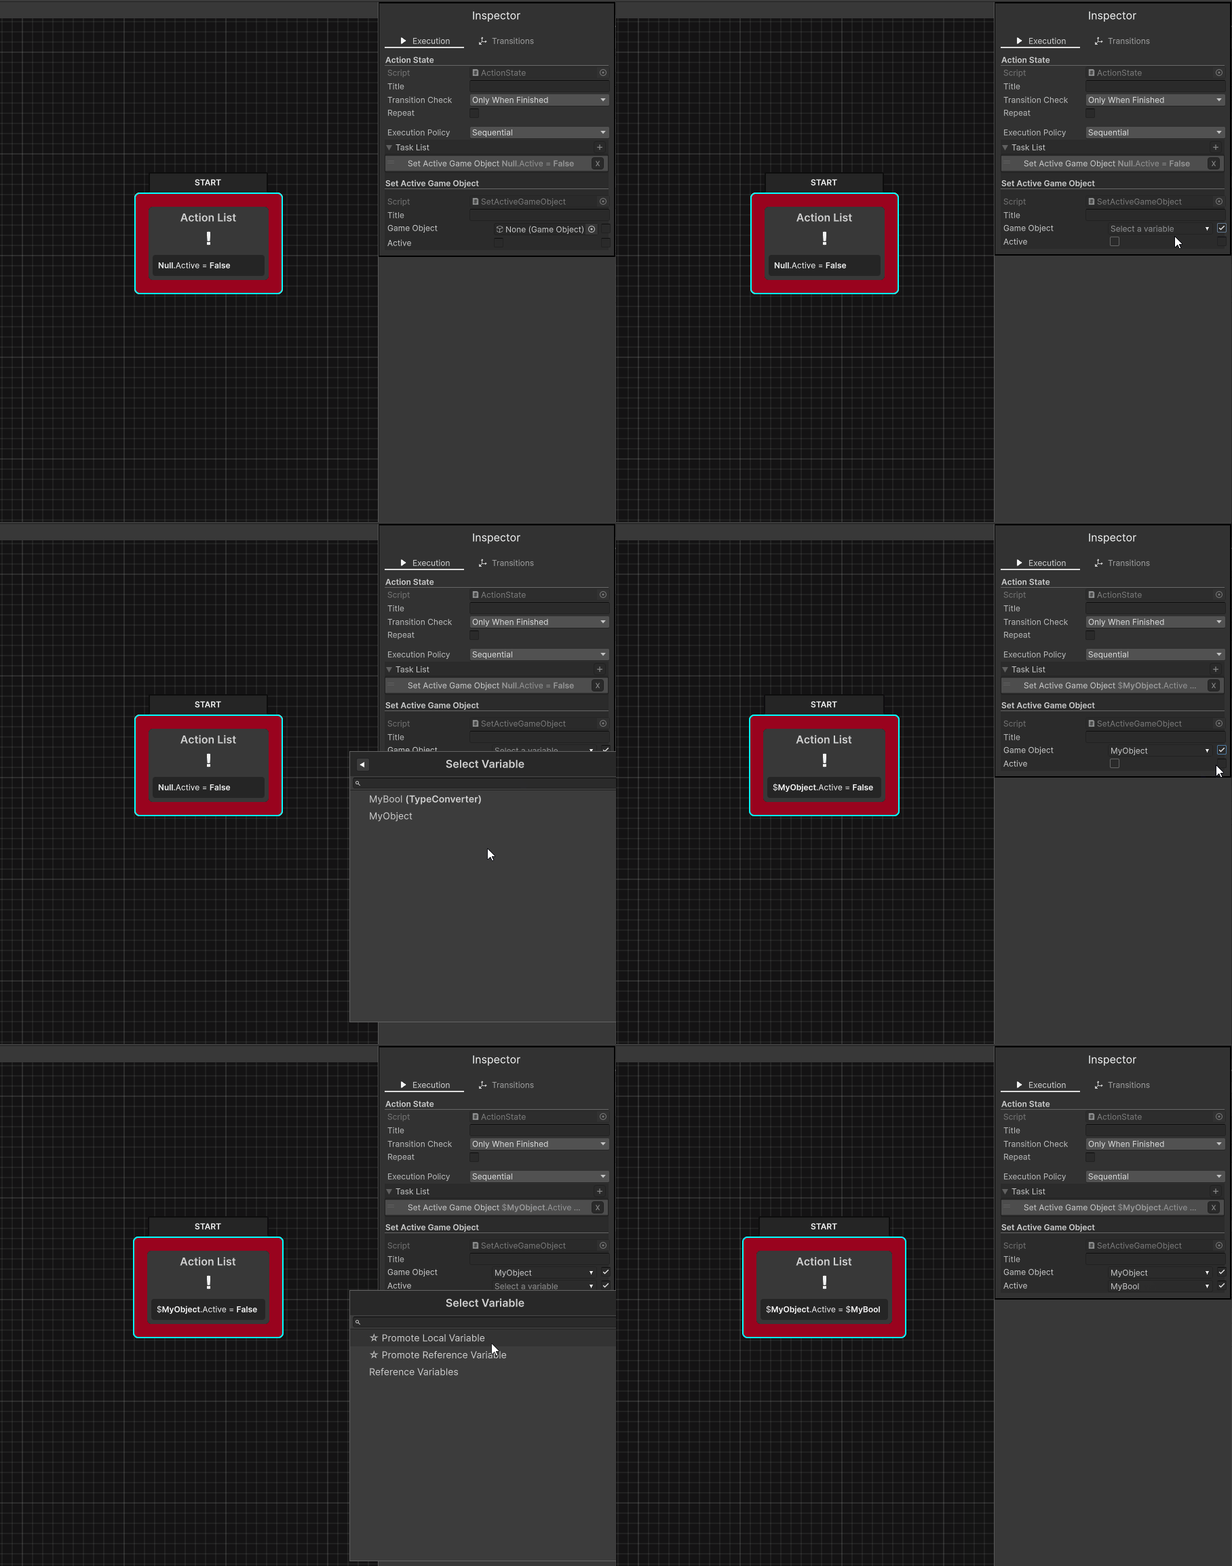
Bind the variables by selecting the task you want to edit and selecting the check box to the right of the variable. This check box, when checked, indicates that you want to bind to a variable. Select the dropdown and search for the desired variable.
Note: You don't necessarily need to do a binding, you can enter the value directly if you don't want to reuse the values.
Create another Action Task to create some simple logic. Add the following Tasks
- Wait Delay
- Set Boolean
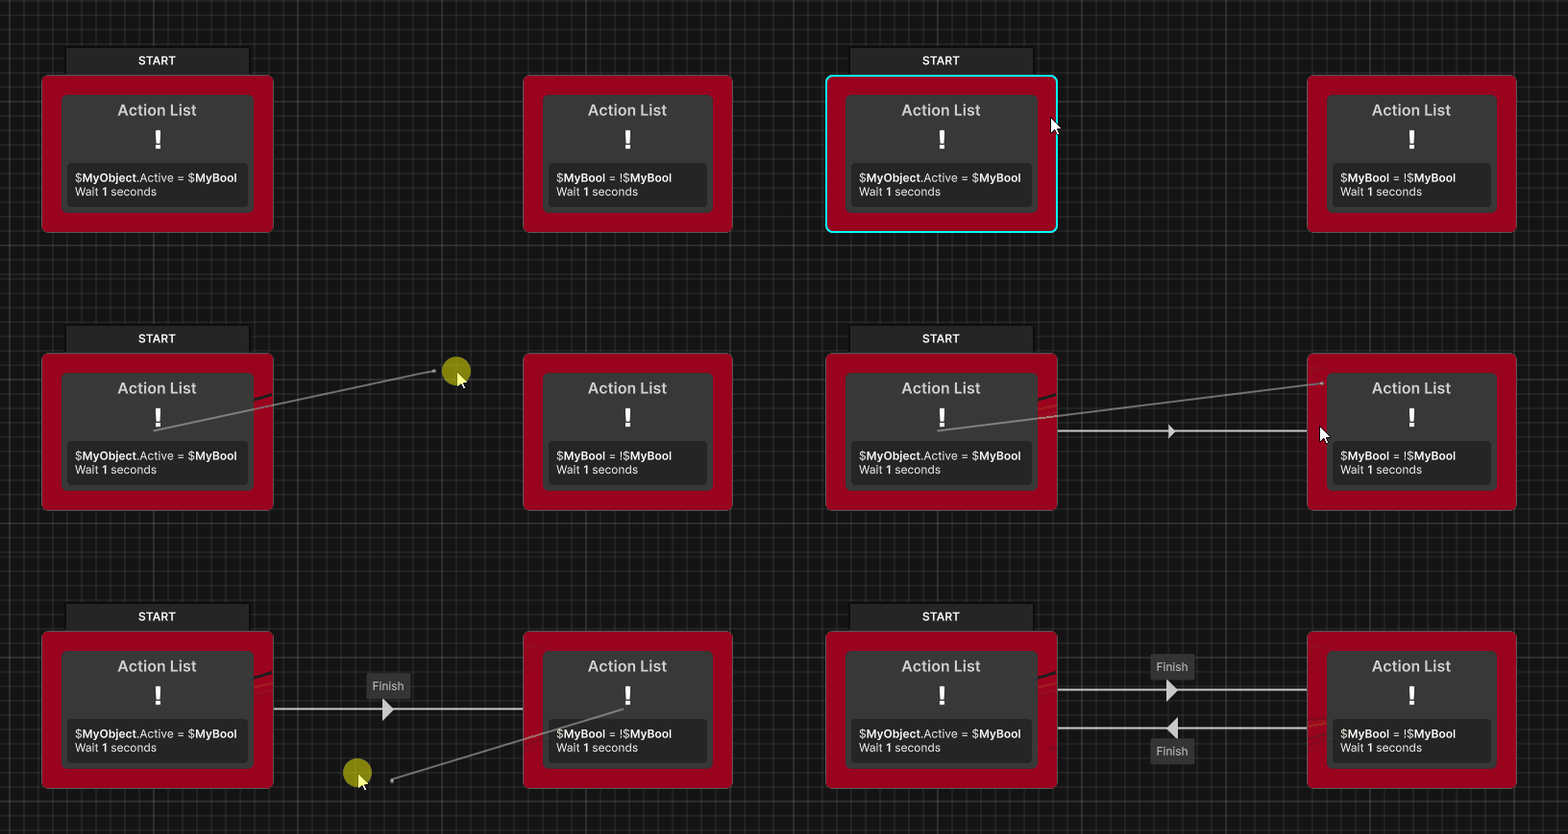
Try to create a logic like the image below
Click on the edges to create transitions between nodes
3. Testing your logic
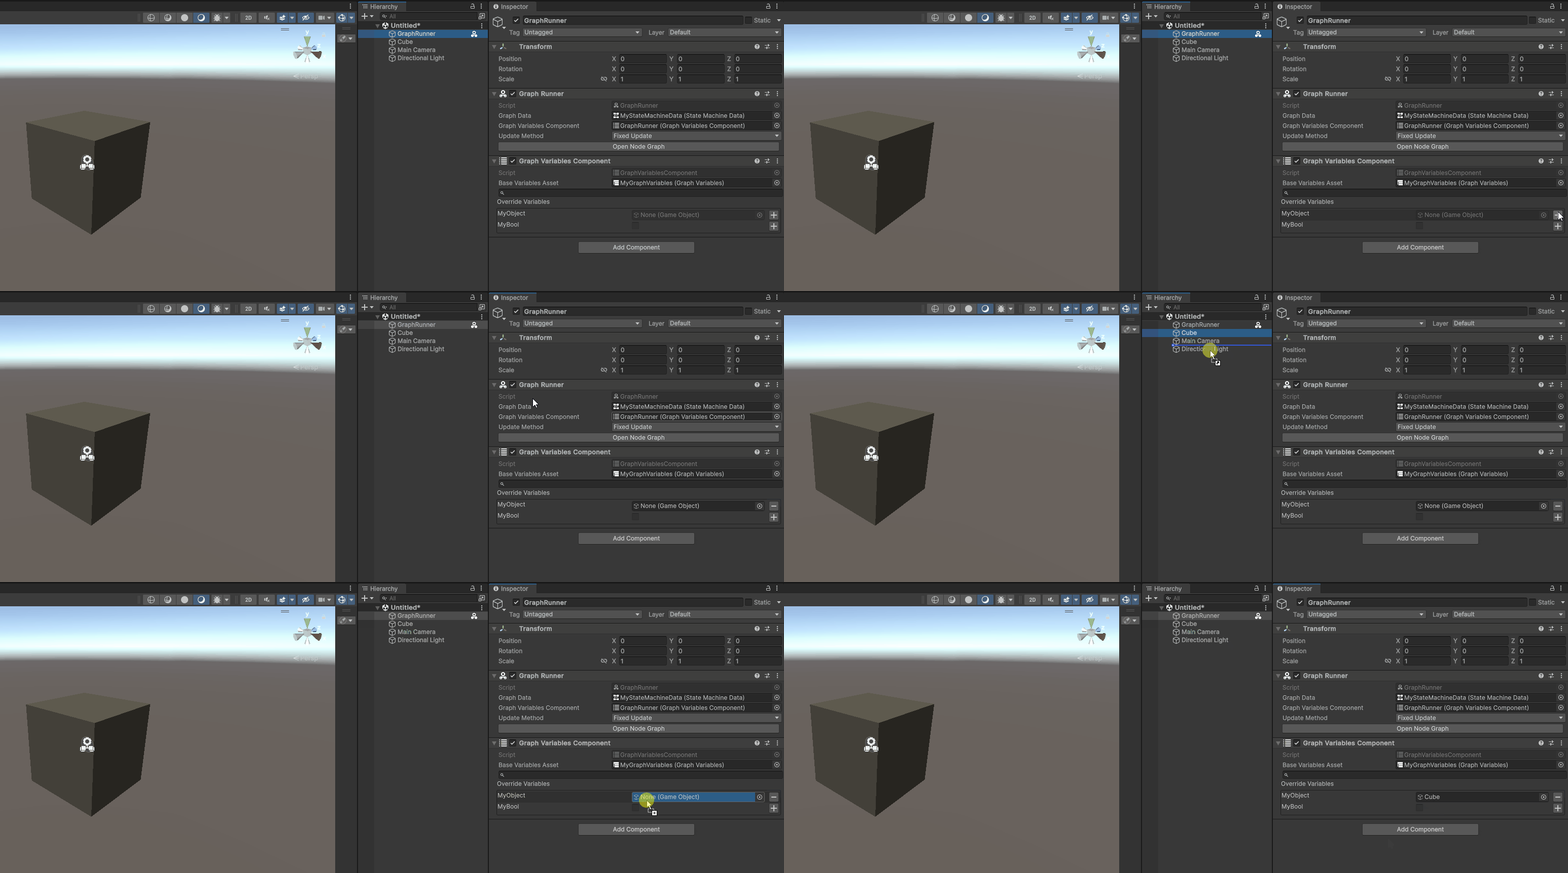
Click the + button to overwrite the GameObject value. Then, create an object in the scene like a Cube, and drag it to the GameObject field you created.
Note: If you don't override it, it will use the values you set in the GraphVariables asset
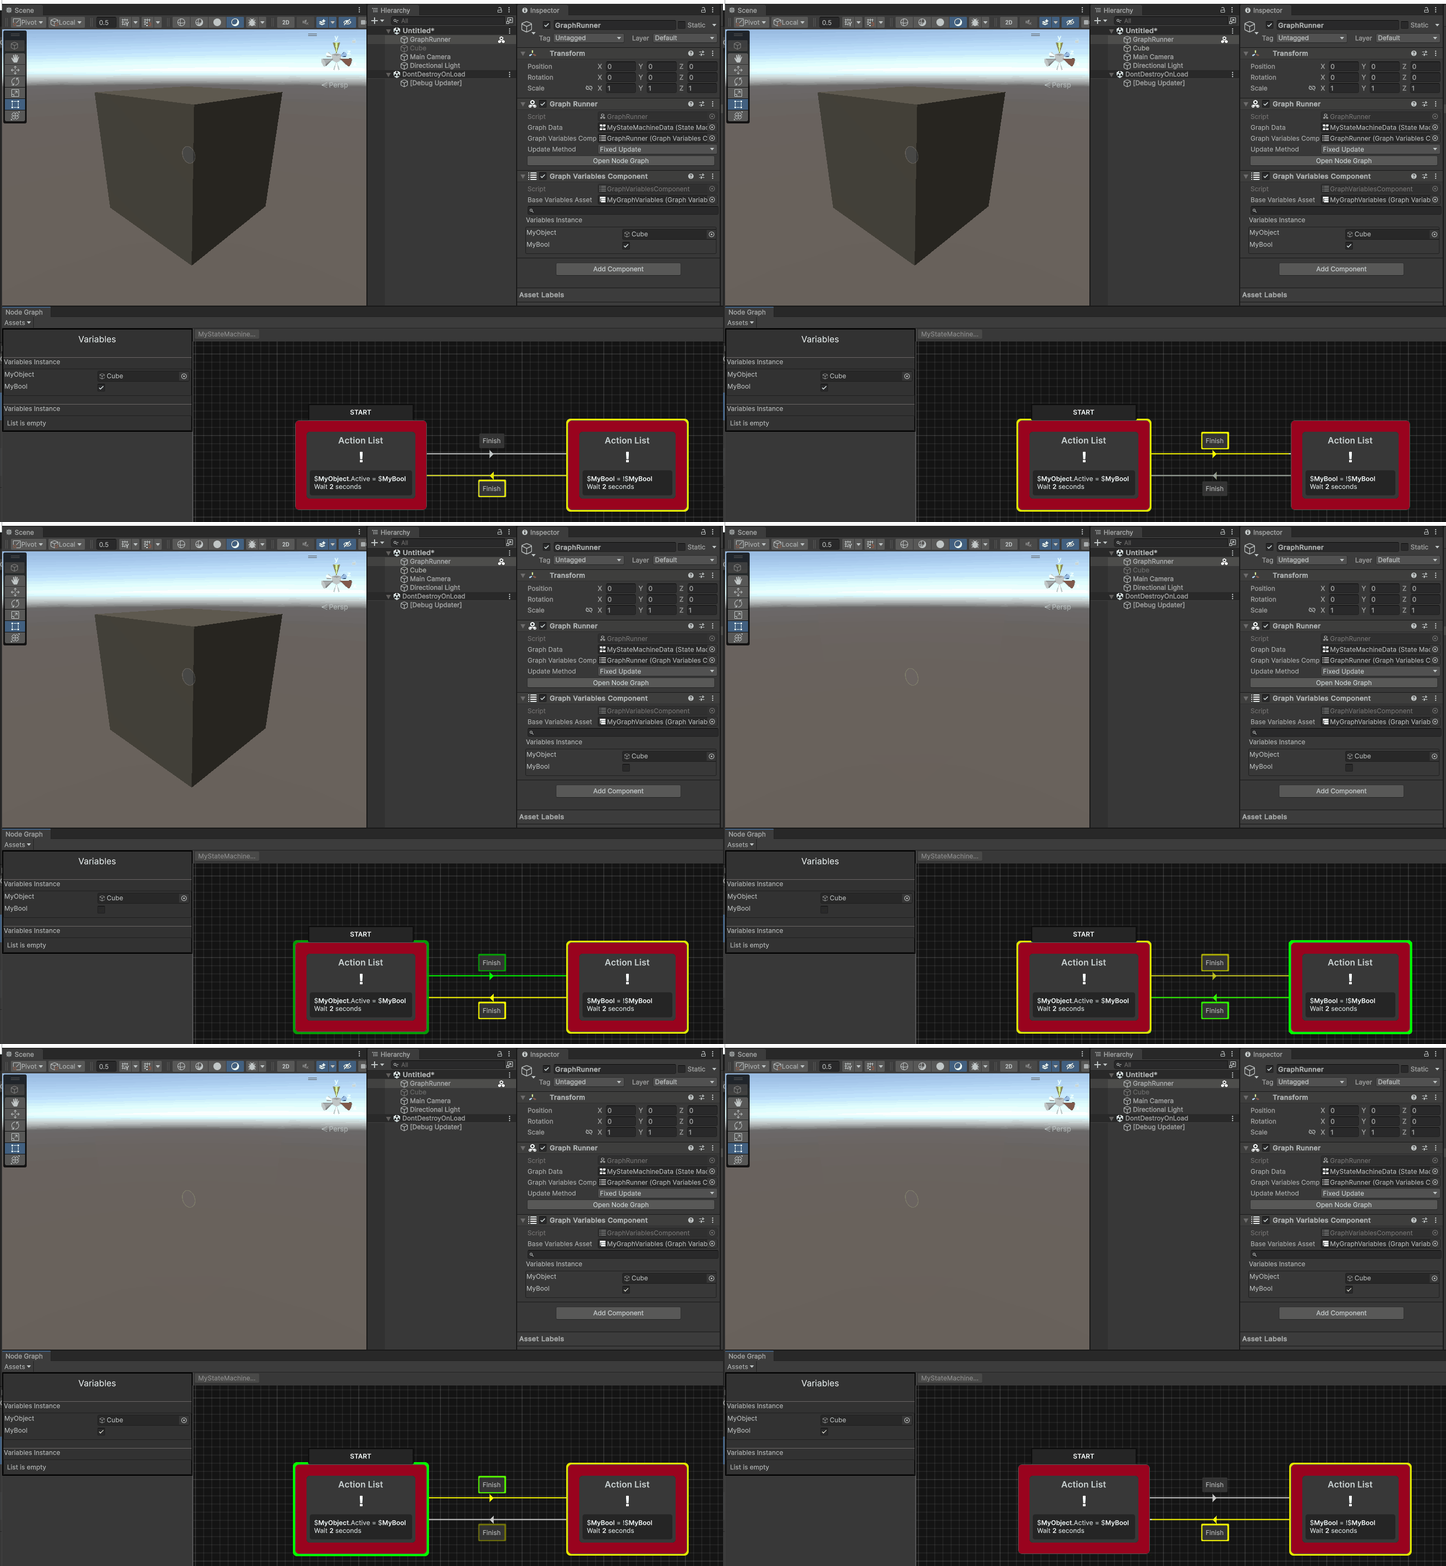
Press Play and select click on the GameObject to see the execution in the graph. This should be the expected result.
Congratulations! You've successfully created a state machine!
Do you accept a challenge?
Now try to solve the challenges below yourself, this will help you practice and improve your understanding of Node Graph.
-
Create a logic that involves ConditionTask and AnyState.
-
Create your own ActionTask in C# and add it in a parallel state. Do something simple like pressing an Input and define a boolean.
-
Create a simple Movement logic, using Inputs, Animator and Rigidbody / Character Controller.
-
Recreate the same logic taught in this tutorial, but now, using Behavior Tree and reusing the same GraphVariables asset.
If you have any questions, read the documentation or ask for help in the Discord group. Good luck!